beginner photography
Exposure triangle
Episode 2
The Exposure Triangle relates to the three fundamental concepts in photography - Aperture, Shutter Speed, and ISO.
In this series, I will take you through all three of these aspects, plus more, and break down each one simply - giving you the stepping stones to explore and research each in more depth as you gain confidence and experience with your camera.
Shutter Speed
Shutter Speed is next on the agenda. Its role determines the exposure and the motion blur within your final image.
What is Shutter Speed?
Shutter speed, also known as exposure time, refers to the amount of time the shutter on your camera remains open. It is measured in seconds, or fractions of a second (e.g., 1/500s / 1/60s, 1s), and it controls the amount of light reaching the cameras sensor. This shutter mechanism exposes the cameras sensor to light, and the longer the shutter remains open, the more light that will hit the sensor. Now, why is this important?
How Shutter Speed Affects Exposure
Exposure itself is distinguished by the amount of light that hits the camera sensor, and images can be too bright (over exposed), too dark (under exposed), or just right (correctly exposed).
A fast shutter speed, (eg. 1/1000s) will see the shutter mechanism, or curtain, snap over the cameras sensor super fast, allows less light to hit the sensor, resulting in a darker image. On the other hand, a slow shutter speed (eg. 1/4s) lets in more light, which will make the image brighter.
motion blur
Other than assisting with exposure, shutter speed effects the way in which movement is captured within your image. A fast shutter speed (eg. 1/1000s) will freeze motion, making a fast-moving object appear sharp and clear. This is ideal for capturing action shots, like a sprinter crossing the finish line, or wildlife, capturing a bird in flight.
Conversely, a slow shutter speed can create motion blur, which can be used creatively to convey movement or speed, such as the slowing of a waterfall, or stars streaking across the sky.
camera shake
With motion blur in mind, camera shake can occur when using slow shutter speeds (eg. 1/30s) when using the camera handheld, which will result in blurry photos with no sharp focus. To minimise this, use a tripod or stabilise your camera. Additionally, as a rule of thumb, it is said to use a shutter speed that's at least as fast as the focal length you are using, (eg. for a 50mm lens, use 1/50s or faster). My photography teacher gave me the advise if handheld, try and not go under 1/60s, to avoid camera shake within your final images.
Creative Control
Understanding how to use shutter speed will give you greater creative control over your images. By adjusting the shutter speed and the exposure time, you can emphasise or de-emphasise certain elements within the frame. For instance, in wildlife photography, using a fast shutter speed (eg 1/5000s) can freeze the motion of a bird in flight, a big cat chasing its prey, an elephant taking a bath, or a crocodile striking at its prey. By freezing these moment, you capture detail within the shot, as a fast shutter speed captures that moment so quickly allowing for sharpness in the image.
A slow shutter speed, is great for astrophotography. Lowering the shutter speed and allowing more light in, helps with capturing the detail in the night sky. this can work with lighting up buildings within the image to have both the building and the sky exposed within the same image. Slow shutter speeds are also used for light paintings, where photographers use a light source to 'draw' an image in thin air, which is then captured on the cameras sensor due to the duration the sensor is exposed to light for,
PRACTICAL TIPS FOR USING Shutter Speed
- 1/1000s & above: Ideal for freezing action, such as sports or wildlife photography.
- 1/500s - 1/60s: Suitable for general photography and capturing moderately fast movement.
- 1/30s - 1/4s: Good for low light situations or capturing motion blur effects (be aware to use a tripod, depending on what subject you are shooting).
- 1s & longer: Used for long-exposure photography to capture movement over extended periods of time, such as star trails or light painting.
Conclusion
Shutter speed is a crucial element of photography that controls how long light hits your cameras sensor., influencing exposure, motion blur, and sharpness. By understanding and experimenting with shutter speed, you can significantly enhance your photographic skills, whether you're aiming to capture a perfectly frozen moment, or creatively blurred motion.
Pairing with aperture
Now that you know what aperture and shutter speed are, and how each of them relates to exposure and their individual characteristics on creativity, aperture with depth of field and shutter speed with motion blur, your next step is to pair these two together, to work in harmony with each other to create the image you want to create.
For example, it is a bright, sunny day, and you want to take a photograph of your friend in front of a landscape whilst on holiday. Perhaps you want that image to be sharp from front to back, as you want your friend in the foreground to be in focus, but you also want the background to be in focus, as it is beautiful and you want to capture all the detail. From learning about aperture, you know that to have everything in focus, the aperture should be set to at least f.16, which lets in less light due to the smaller hole.
You know you want everything in focus, so a fast shutter speed will be required, so you choose 1/125s and above. Now, this is where the shutter speed is the one controlling the exposure, as you have chosen the aperture required to get the effect you want, of everything in the image in focus, the shutter speed needs to be adjusted to expose the image correctly. The f16 has a small hole, letting less light in, so with such a sunny day, you might get away with shooting with a shutter speed of about 1/250s, which is still fast, but as the day is so bright, this might be enough to expose the image correctly. If not, try stopping down to 1/125s, and again to 1/90s. But remember, that the lowest for handheld is about 1/60s to stop camera shake.
If you are unable to achieve a good exposure with the aperture and exposure where you need them to be, this is where ISO steps in.
what's next?
Achieving the perfect exposure requires a balance between aperture, shutter speed, and ISO, which is why it is called the exposure triangle.
Next we will discuss ISO, the final point in the exposure triangle, and how this works in relation to light and the effect your images.

1/1600s
As you can see, with a fast shutter speed, I was able to freeze the blades of this wind turbine. Looks like they aren't spinning at all.
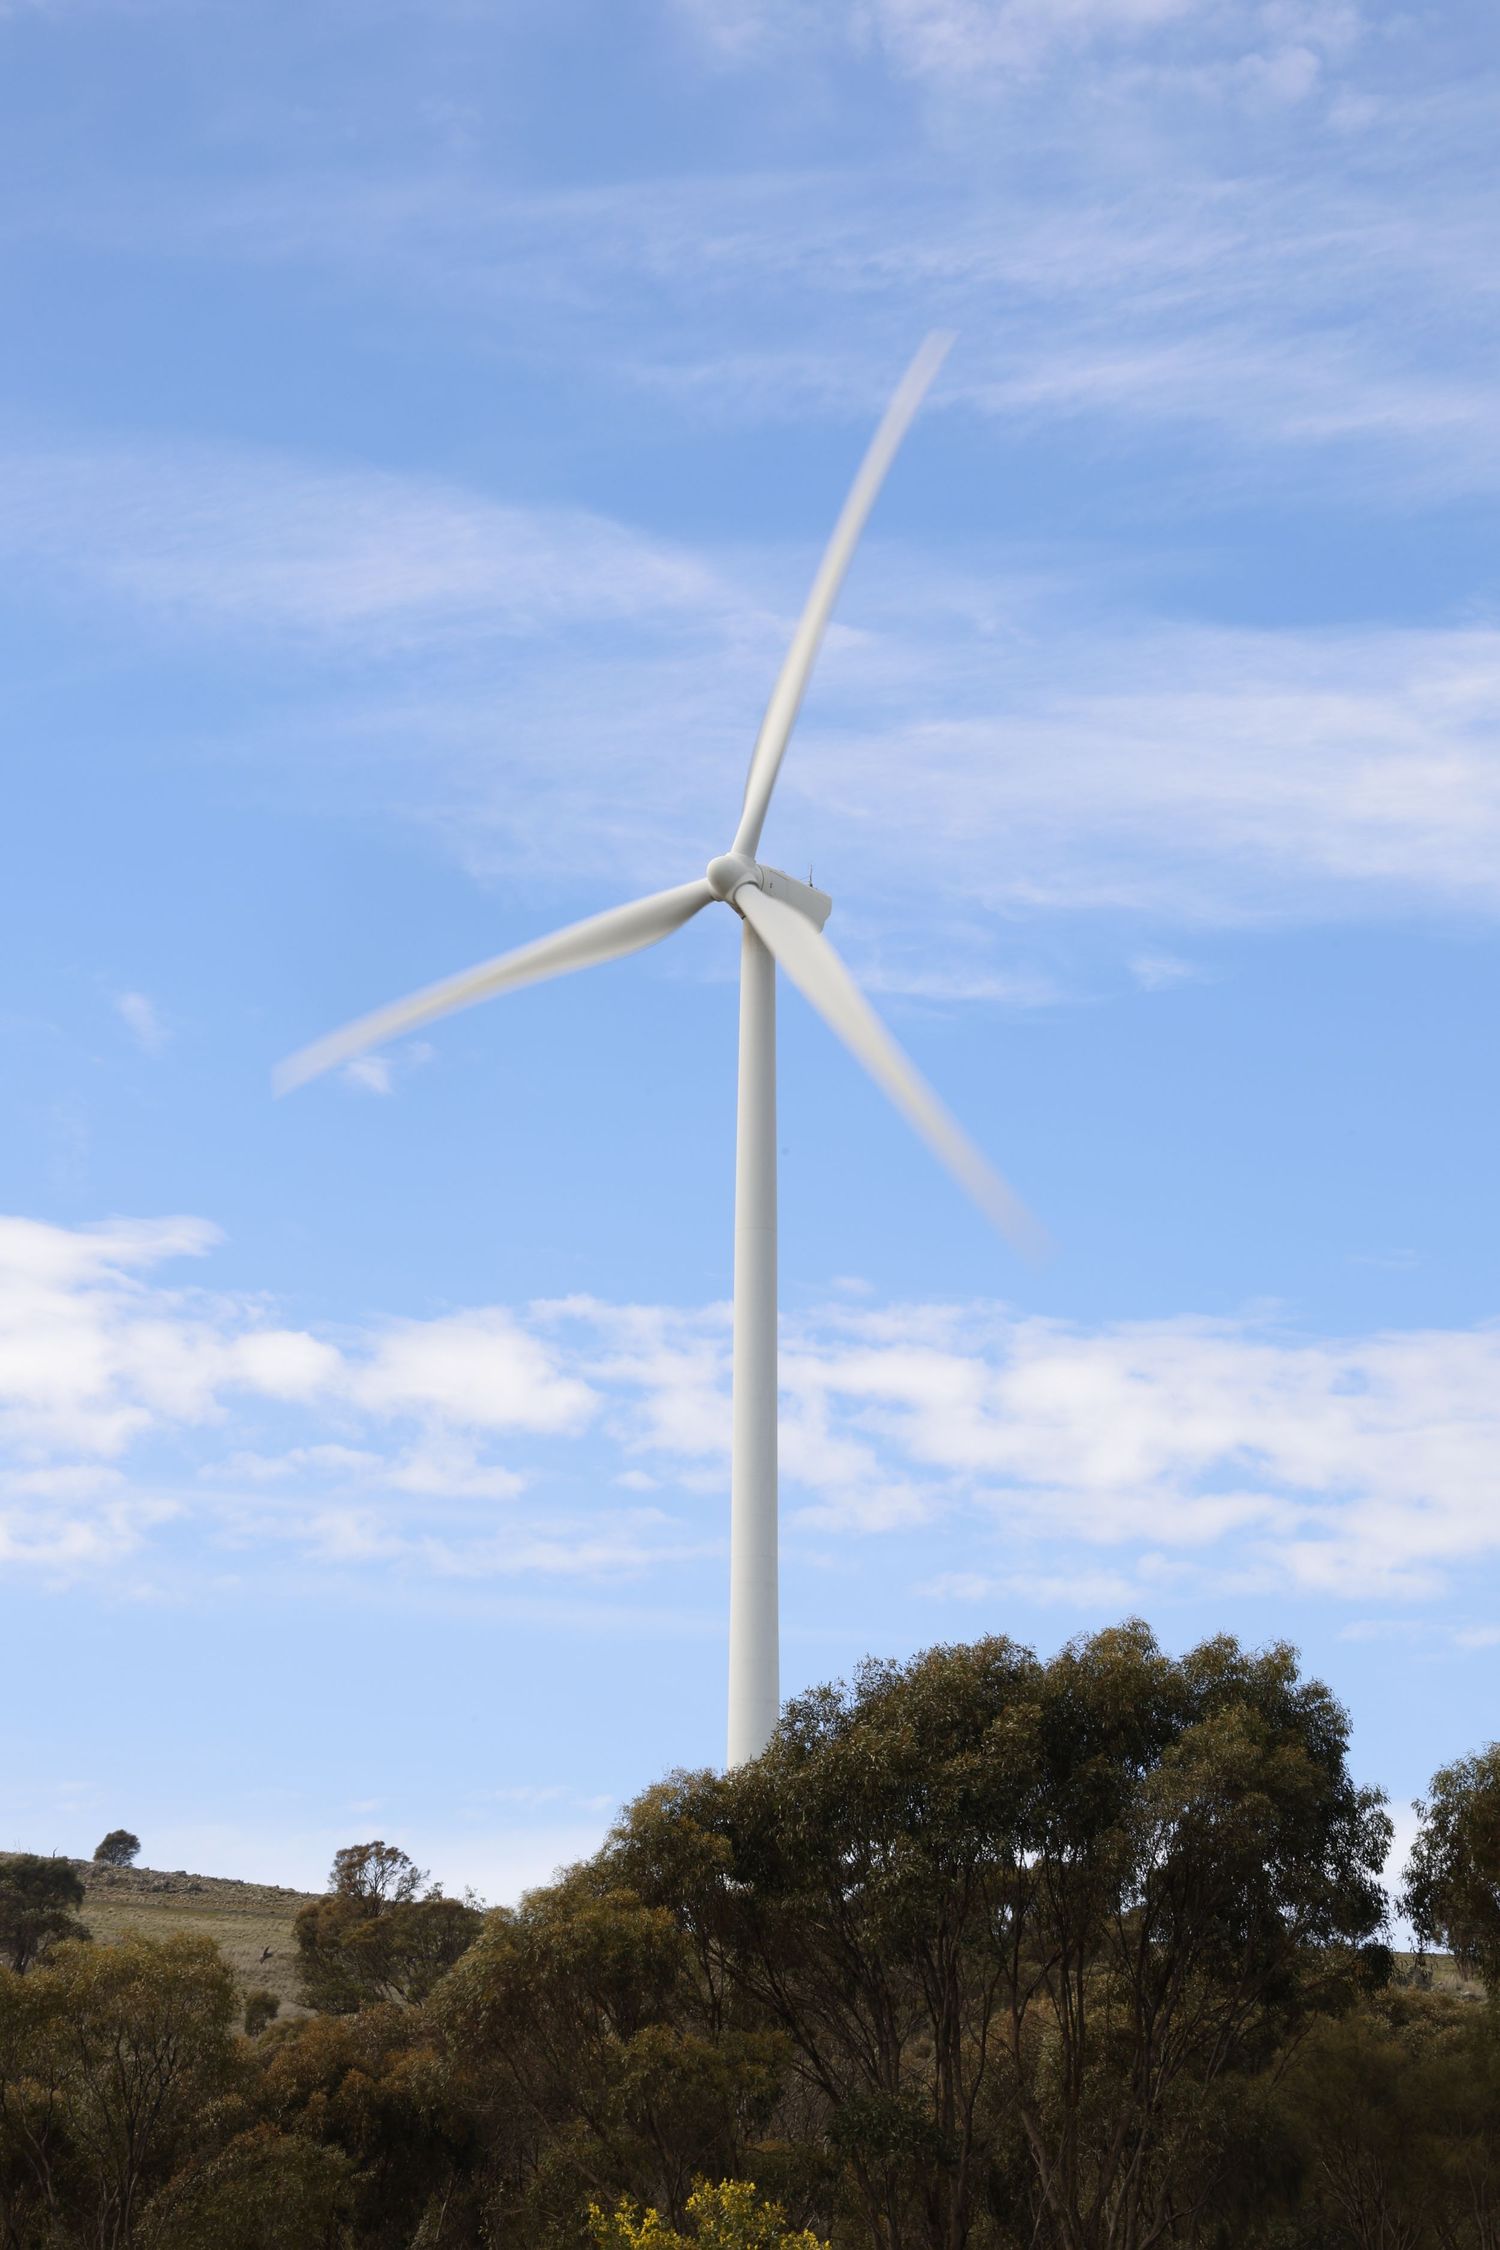
1/25s
With a slow shutter speed, you can see that the blades are now blurred, capturing the motion.


